
As promised, I have some fun craft tutorials! I found a version of this on Pinterest that was for sale with no tutorial so I decided to do it myself.
- 8-10 sheets of felt
- Canvas size of your choice
- Painters tape
- Spray paint
- Hot glue and glue gun
- Ruler
- Pencil
- Some sort of bead for the center
1. This was the hardest part and I have no good way to tell you how to do it. Basically you need to use the painters tape and the ruler to make a chevron pattern on the canvas. I measured so that each piece was 1 inch long. So 1 inch to each point of the chevron. As you can see, it's not perfect. But I figured there will be a huge flower in the middle so it's okay.


2. When you're done with that, spray paint it, any brand of paint will do. Make sure to spray paint from all angles so you don't miss any spots.
**There is another option instead of painting the chevron pattern. You can get chevron fabric and cover the canvas with that. **
3. Once that dries and you take off the tape, it's time to work on the flower! First you want to cut a stencil for your petals. I chose this shape and I kinda just winged it until they all looked like the same general shape. You'll want four sizes. There are only three sizes pictured, but go ahead and make one just a little bigger than the biggest shown.
Choose the size of your petals based on how big your canvas is and how big you want your flower to be. I cut my stencils out of cardboard from an old cereal box.

When you cut them out make sure to cut just inside your stenciled line or else you'll see it on the felt.
 |
| Once again only 3 sizes are pictured. |

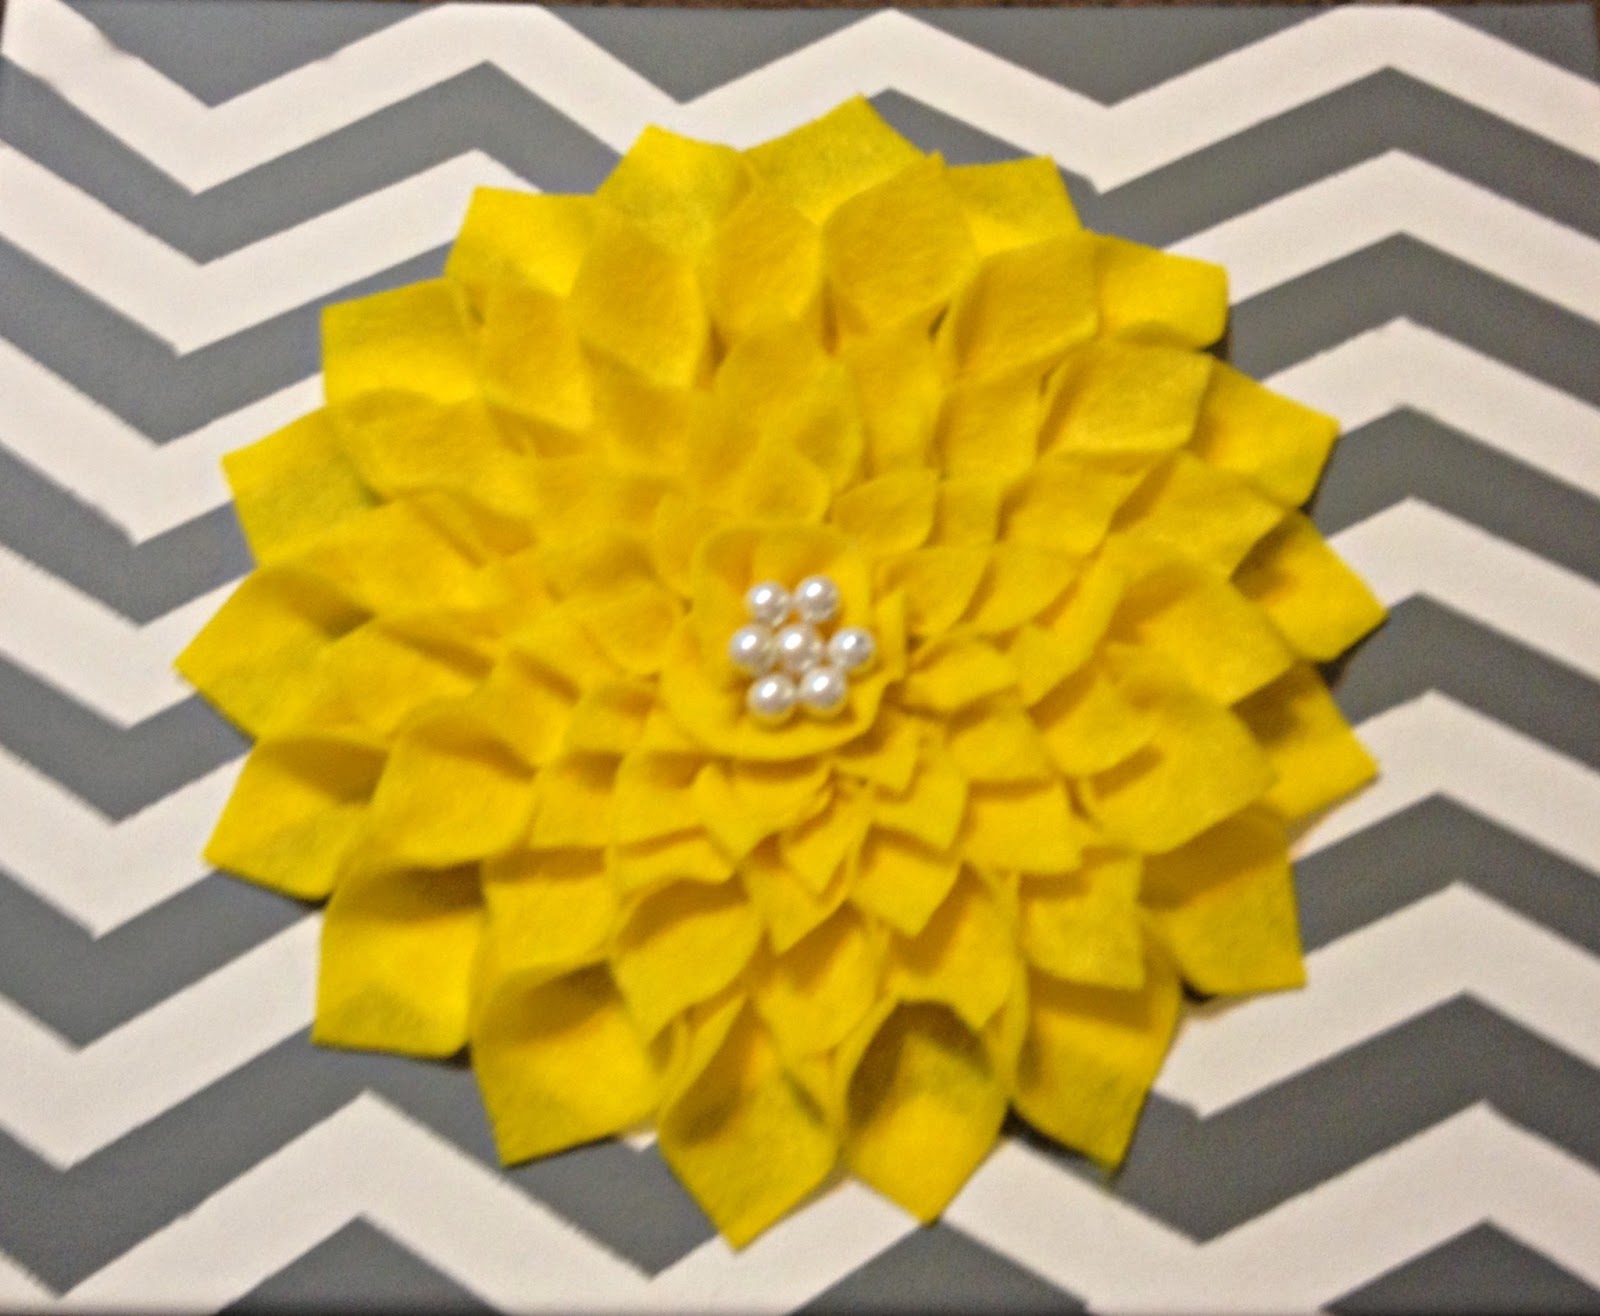
6. Place the petals in a circle on your canvas. Start with the biggest petal. Arrange it the way you want it and then glue each petal in place.

You may or may not use all of your petals just depending on how large your flower is. You also might have to cut more petals.
8. In the very center I just took a little circle of felt and kinda squished it together and then added some old pearl beads to the middle.

I made two because I'm putting them over my nightstands. They don't look perfectly the same but they won't be right next to each other so you can't really tell unless you're mercilessly staring at them.
Well that's it! I hope you found the tutorial useful. Let me know in the comments if you make it.
Super cute! Love these! Www.entertainingcreativity.blogspot.com
ReplyDelete